Installing New Emsisoft Key
Step 1
To begin the process of replacing an Emsisoft key, you must first open the Emsisoft application that is running on the machine. This can be done multiple ways, however the fastest, and most efficient way would be clicking on the Emsisoft sheild found in the lower right hand corner just left of the clock.

If this sheild is not present, it is possible that it will be in a 'sub-menu' shown as an upwards arrow in the same location
If you do not have Emsisoft installed, or need to re-install Emsisoft for any reason, you can find the installer at the following link.
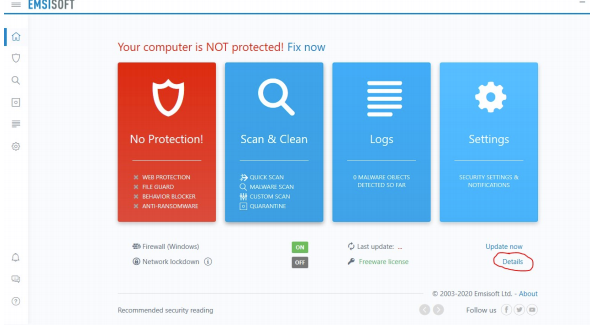
Step 2
When opening the Emsisoft application you should be presented with the 'Home' Page. On this page, under the blue box's on the right hand side, should be information on the current lisence. Click on the 'details' option to bring up the menu that allows for a new license key to be inserted.
With the details menu on the screen you should now see an option to 'Change Lisence'. Click that option to open the menu the new key will be entered into.
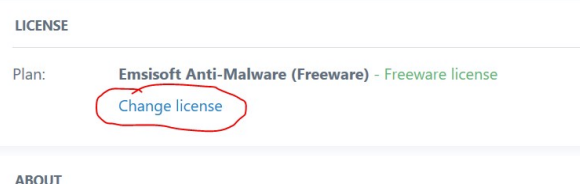
Note that this option has different responsibilties then 'Renew Lisence', if presented both options make sure you click 'Change Lisence'
Step 3
When the new lisence key window appears it will ask you to provide log in information. If you do not have an emsisoft account you can register at this time. If you do not wish to create a new account then you can proceed by clicking on the 'enter key' option seen in the lower right hand corner of the window.
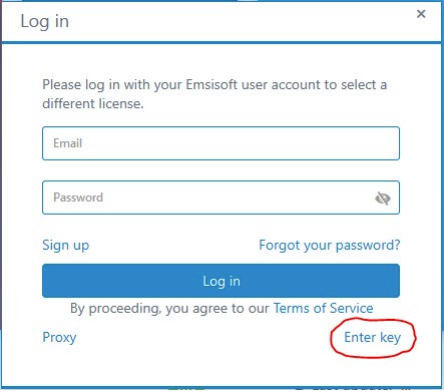
Clicking on 'Enter Key' bypasses account creation
After the account was signed in to, or skipped passed you should be presented a window with a single feild. This is where the 12 digit lisence key is entered.
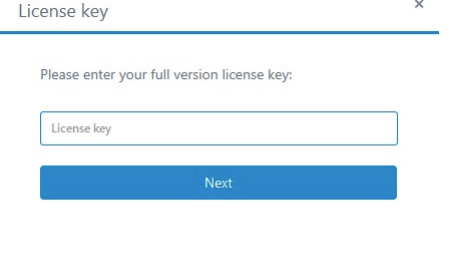
Once the new key is entered, click the 'next' button for Emsisoft to attempted authentication
After the key is verified you should be returned to the 'Home' page. To check if the key was accepted, look for an updated 'days remaining' value, if the amount of days are the same as before, then there could have been an issue with verifing the key.
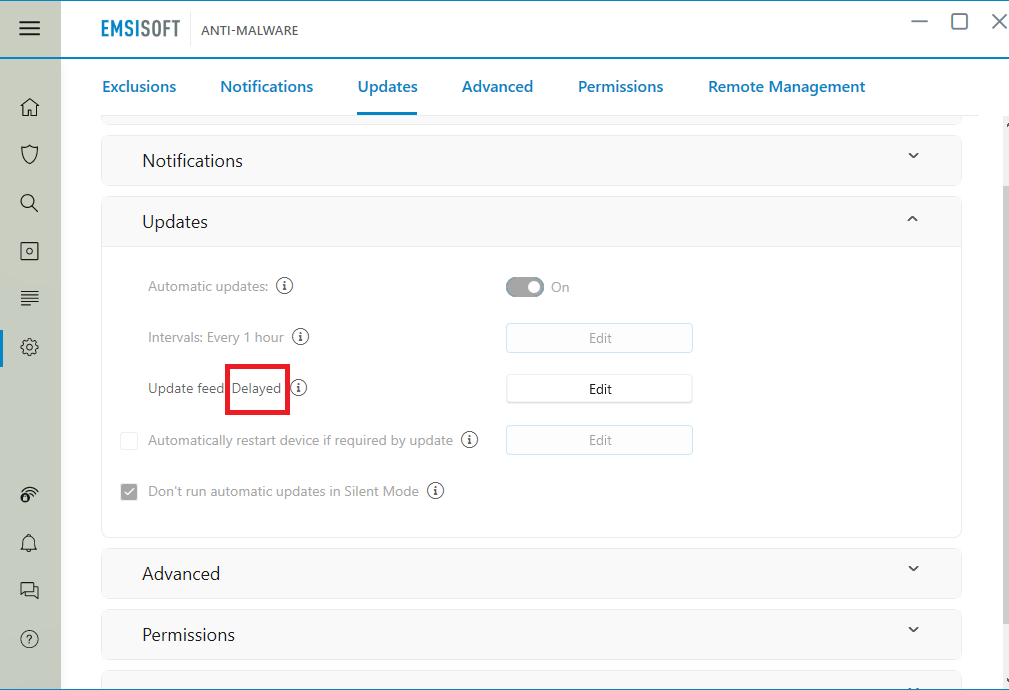
Step 4
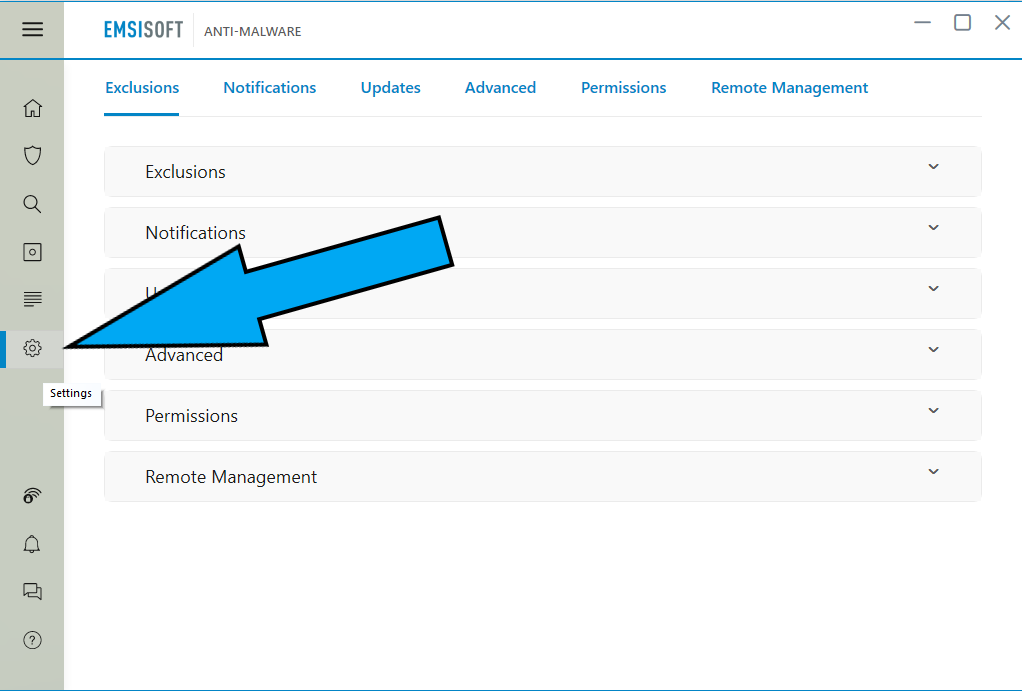
The final step to installing Emsisoft is ensuring the update feed is set to delayed. This will ensure only known working versions of Emsisoft is installed and help mitigate the amount of errors seen from the program. To begin, select settings on the left hand side of the window.
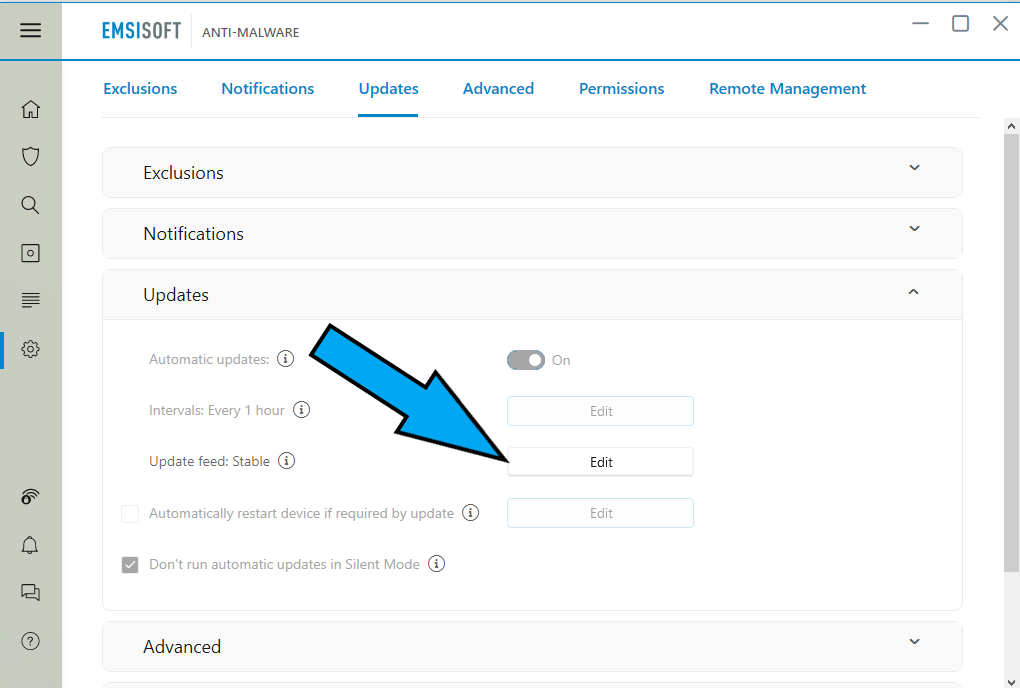
Once inside the settings window, navigate to the udates dropdown. Here you will find the option to change the "update feed" to delayed. To do so click on the "Edit" button to the right of update feed.
In the dropdown menu, change the select feed to delayed
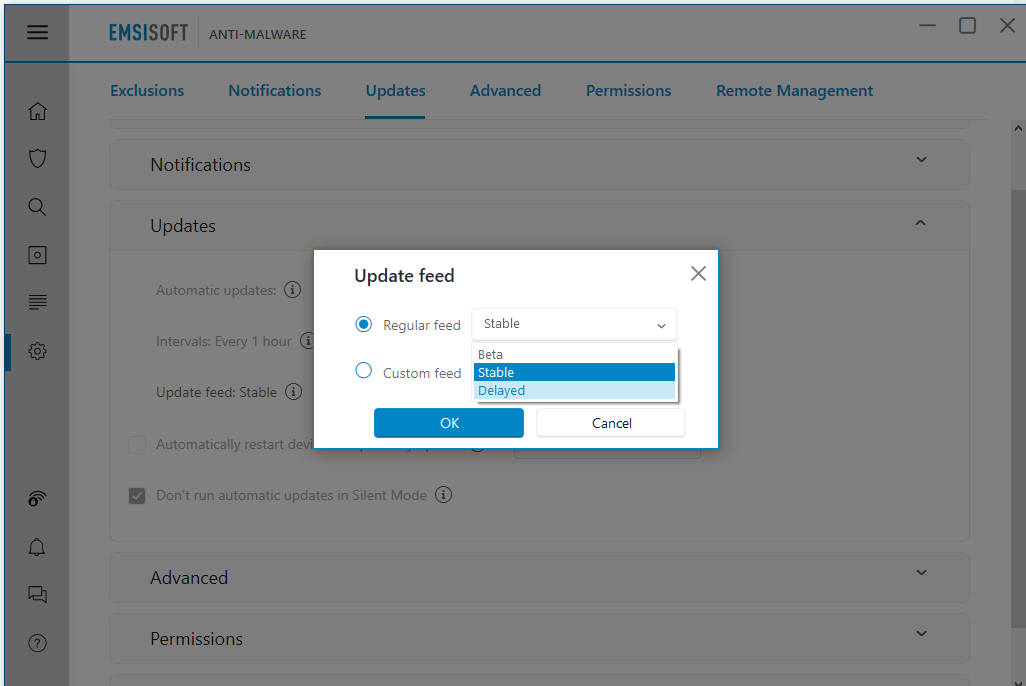
Once finished ensure you select okay to close out of the update feed settings menu
Once the changes have been made you should now see that it says "delayed" next to the update feed