Configuring Open DNS
Step 1
To start of open the windows settings menu.
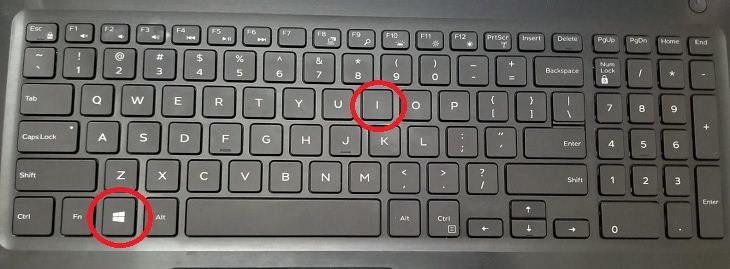
A quick way to open the windows settings is by holding down the Windows key, and pressing 'i' at the same time.
Step 2
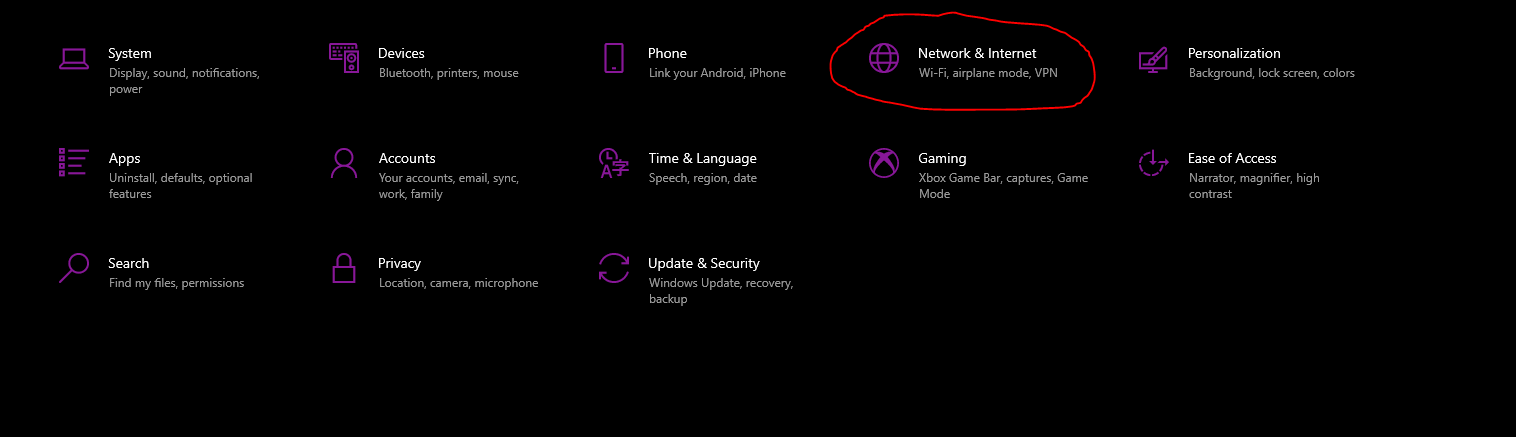
Navigate to the Network & Internet option, inside of the windows settings menu
Step 3
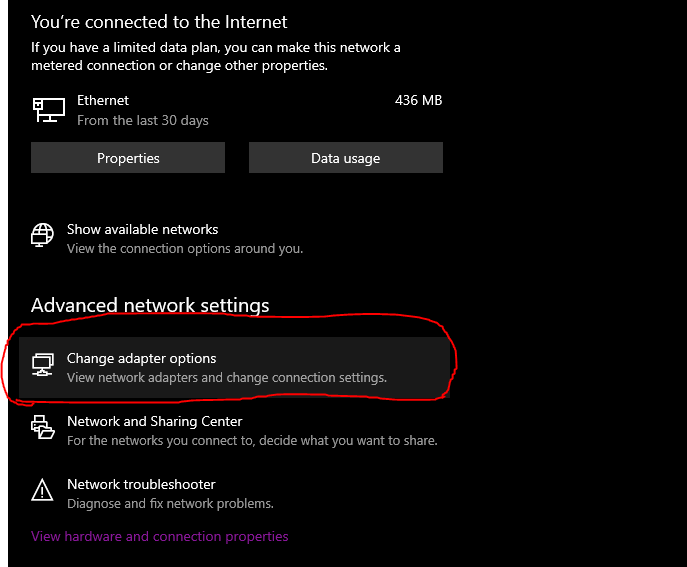
You should now see a network status screen. Click on the change adapter options, this should open a new window, if the change adapter options is not visible at first, you may have to scroll.
Step 4
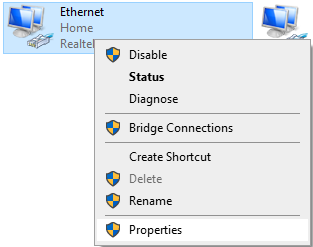
Right click on the network adaptor currently being used, this will most likely be one that has no red X. Select Properties at the very bottom menu, as seen below.
Step 5
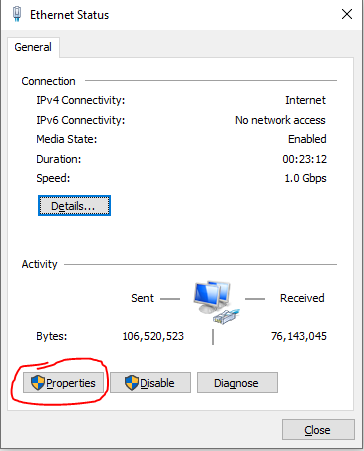
Another window will appear holding information on that network adapter, select the option Properties
Step 6
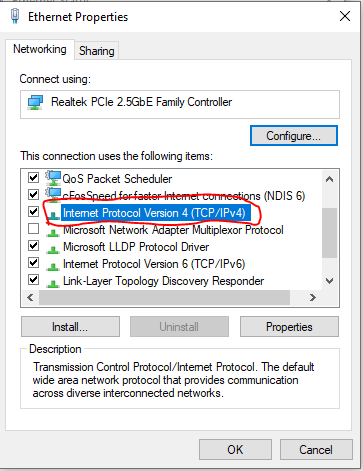
With the Properties window opened, you should see a list of options. Find the line titled Internet Protocol Version 4 (TCP/IPv4), and double click this option. It will open the window that allows us to change our DNS server.
Step 7
By default windows will have your ISP in charge of setting your DNS server. To change that select the “Use the following DNS server address” in the lower section of that window. This will now allow us to set our own DNS server address, we want to use Open DNS. To do that, use the following Preferred DNS server, and Alternate DNS server.
Preferred DNS Server: 208.67.222.222
Alternate DNS Server: 208.67.220.220
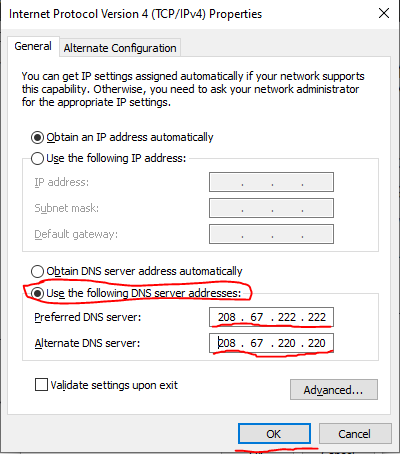
After entering the two DNS server address, apply the changes by clicking OK.
Once the window closes, the DNS servers should now be set to open DNS. All other windows are okay to close, as they were just means of getting to the DNS server window.